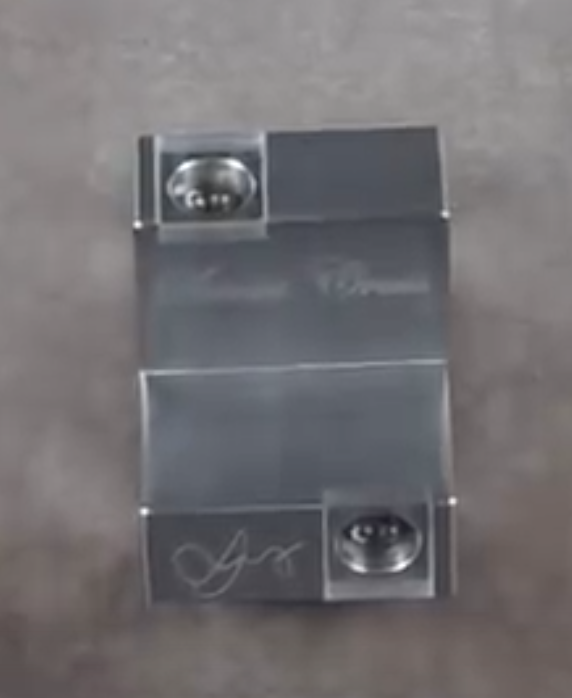
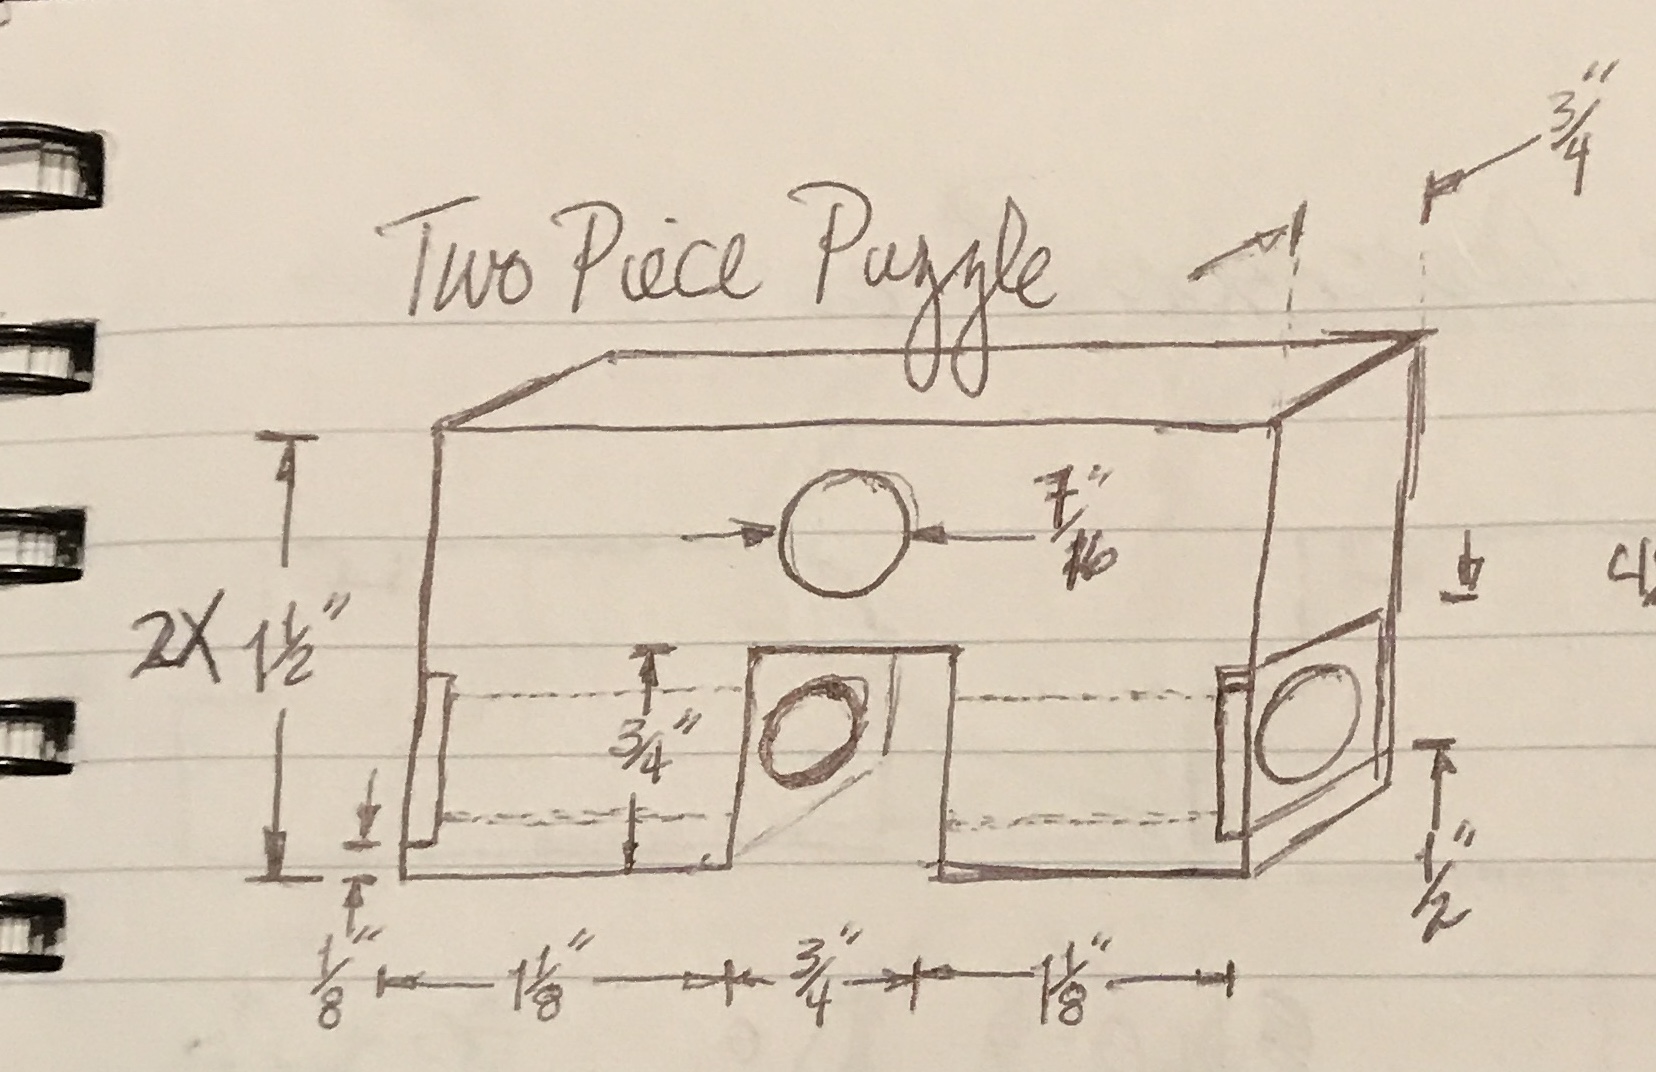
The Sweta Cross puzzle was featured on Mr. Puzzle. It seems simple to make so I will give it a shot. I just happen to have a block of 3/4" aluminum. The solution requires a little manual dexterity and some spinning. A little polishing and it should look really nice. The two main parts are made from 3/4" X 1 1/2" X 3" blocks of aluminum. A rough sketch of the aluminum parts is shown below next a photo of the original.
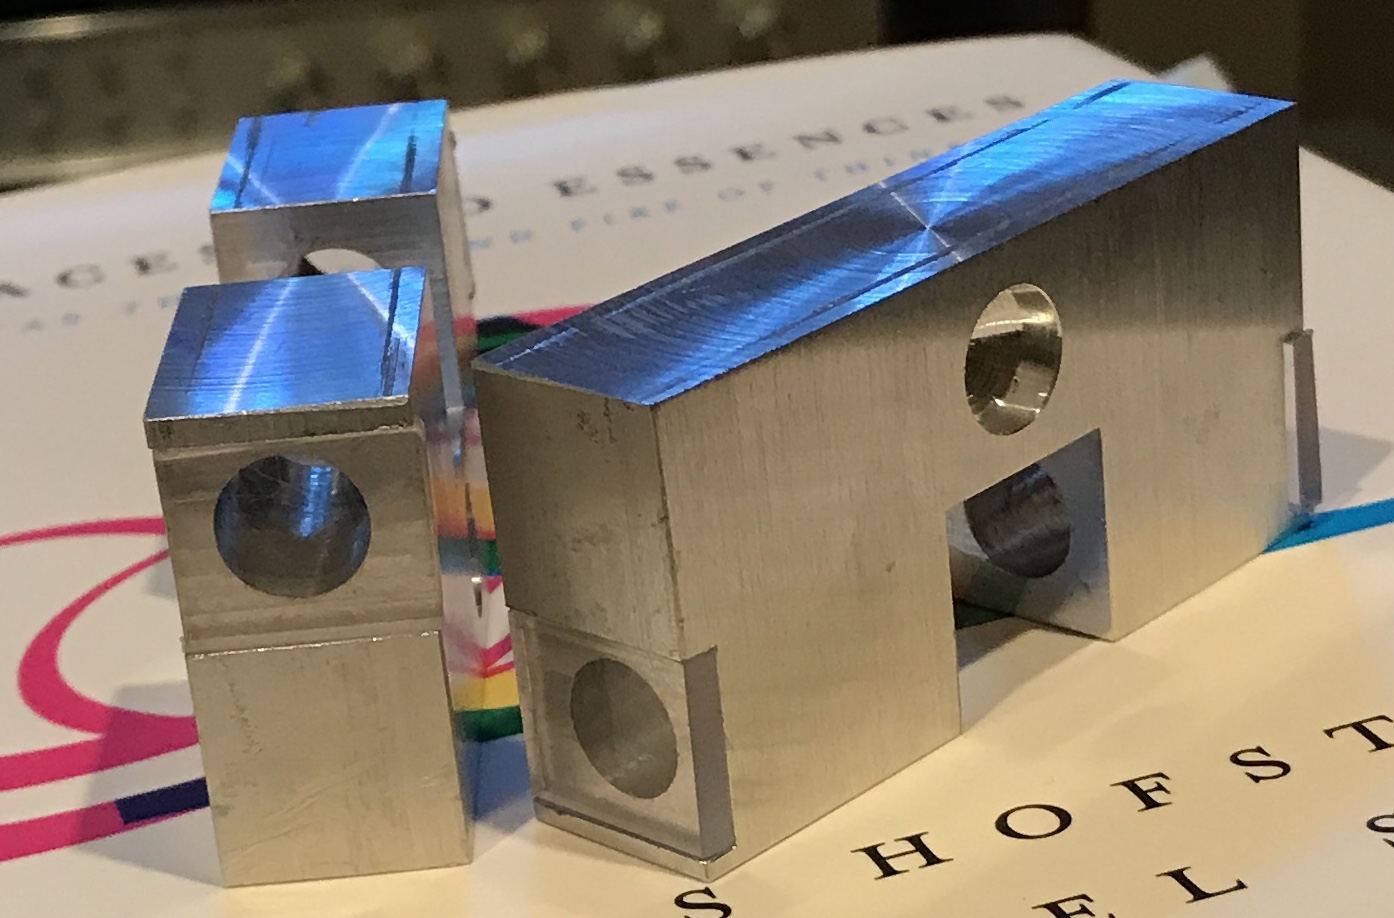
Two blocks slightly oversize were cut from the 3/4 X 3" blank with the band saw. The saw cut ends were cleaned up on the South Bend using a 4-jaw chuck. The two blocks at this stage are shown below.
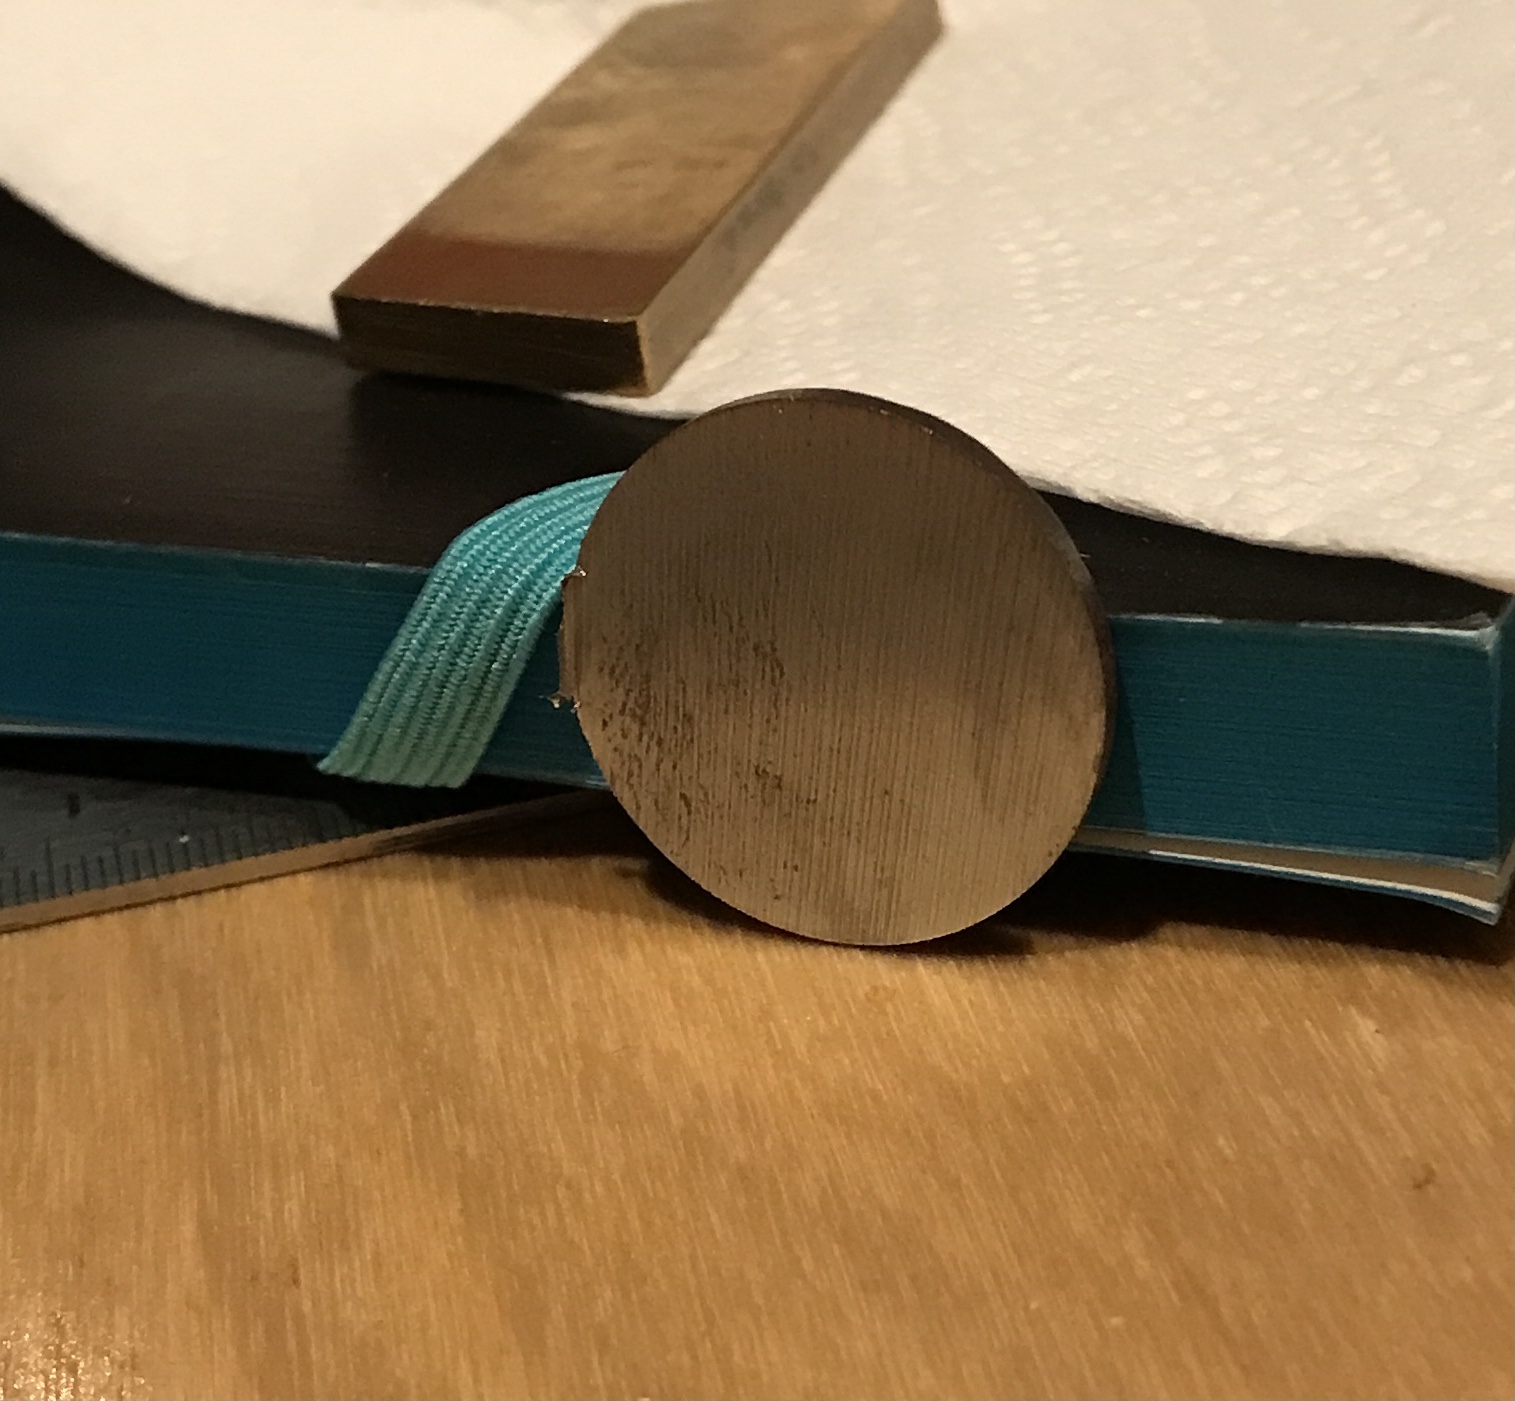
Four rods need to be made. These lock the parts together and hold the ball bearings. A 12" length of 1/2" brass hex was held in the three jaw chuck in the South Bend. The end was faced and drilled 5/32" to a 5/8" depth. The diameter was reduced to 0.430", to be a loose sliding fit in the 7/16" holes drilled in the aluminum. The rods were parted off at 63/64".

Notice the large nipples left on the rods. The parting tool was fit to the "red" washer on the lantern tool post. I must not have noticed that the blade does not come up to the same level as the top of the tool! It is about 3/64" shy. I found two washers that when put under the parting tool lift it closer, thus the remaining nipple. I will need to make a new washer for this tool.
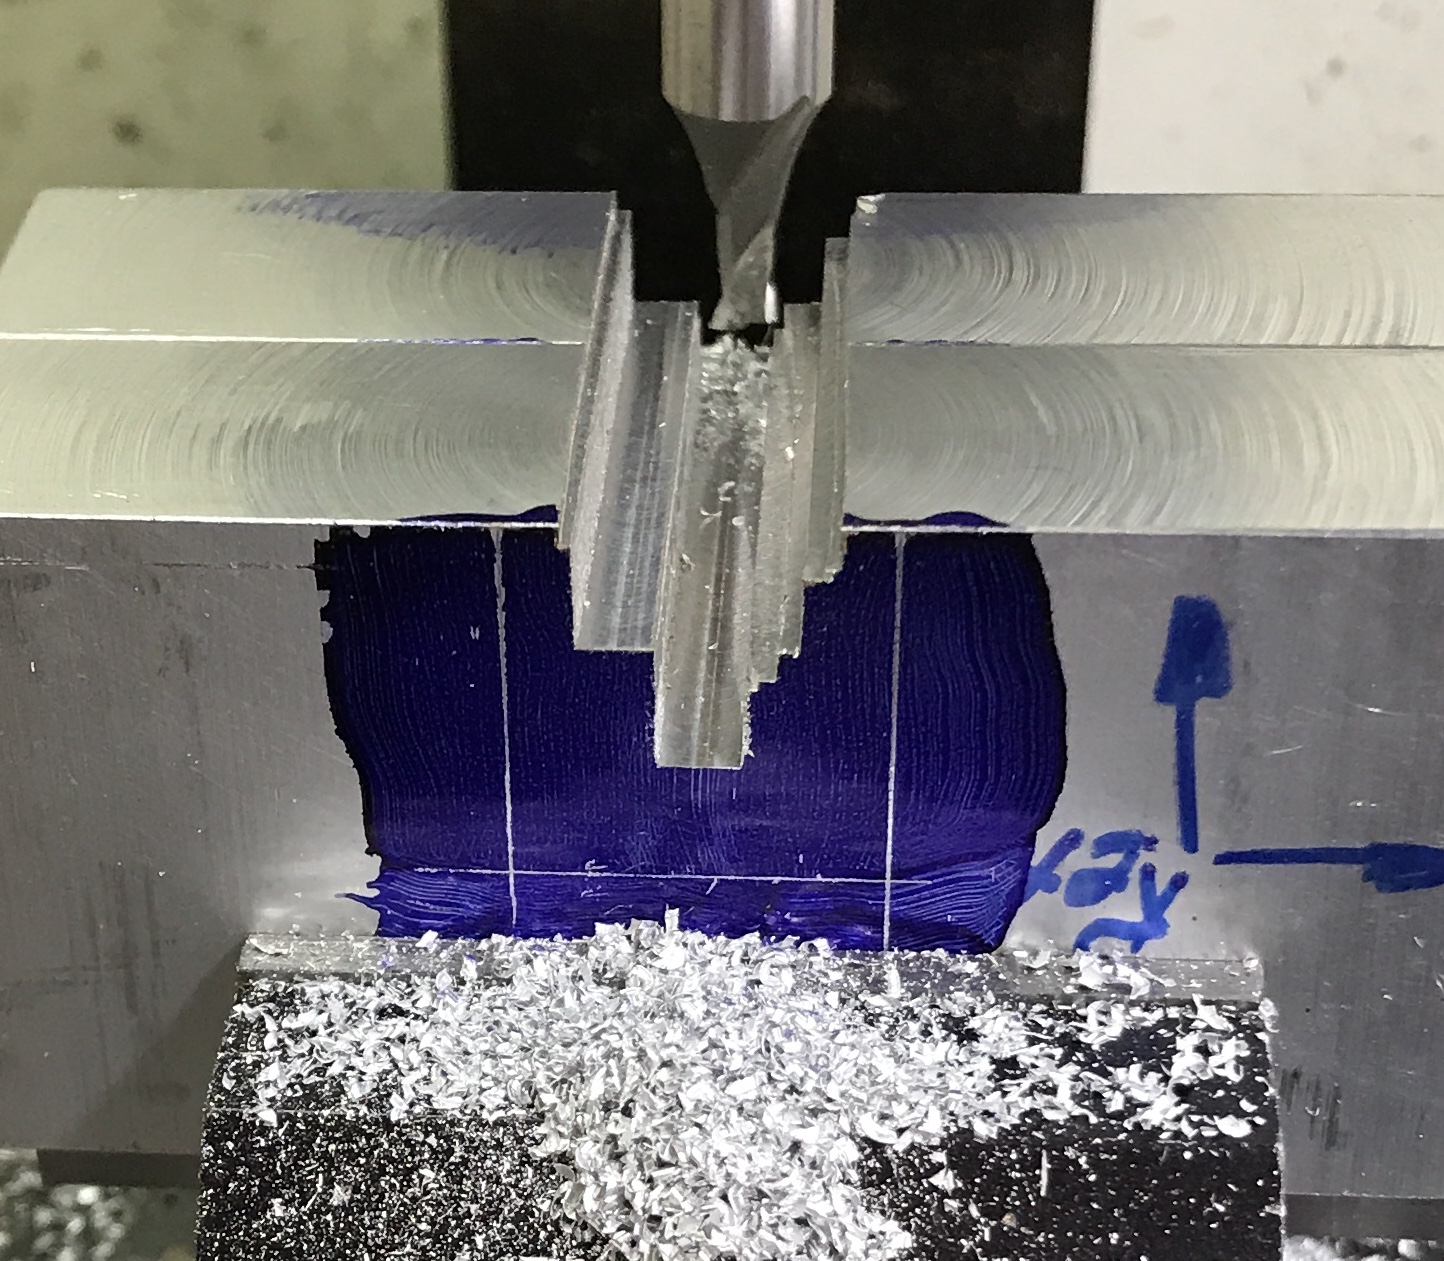
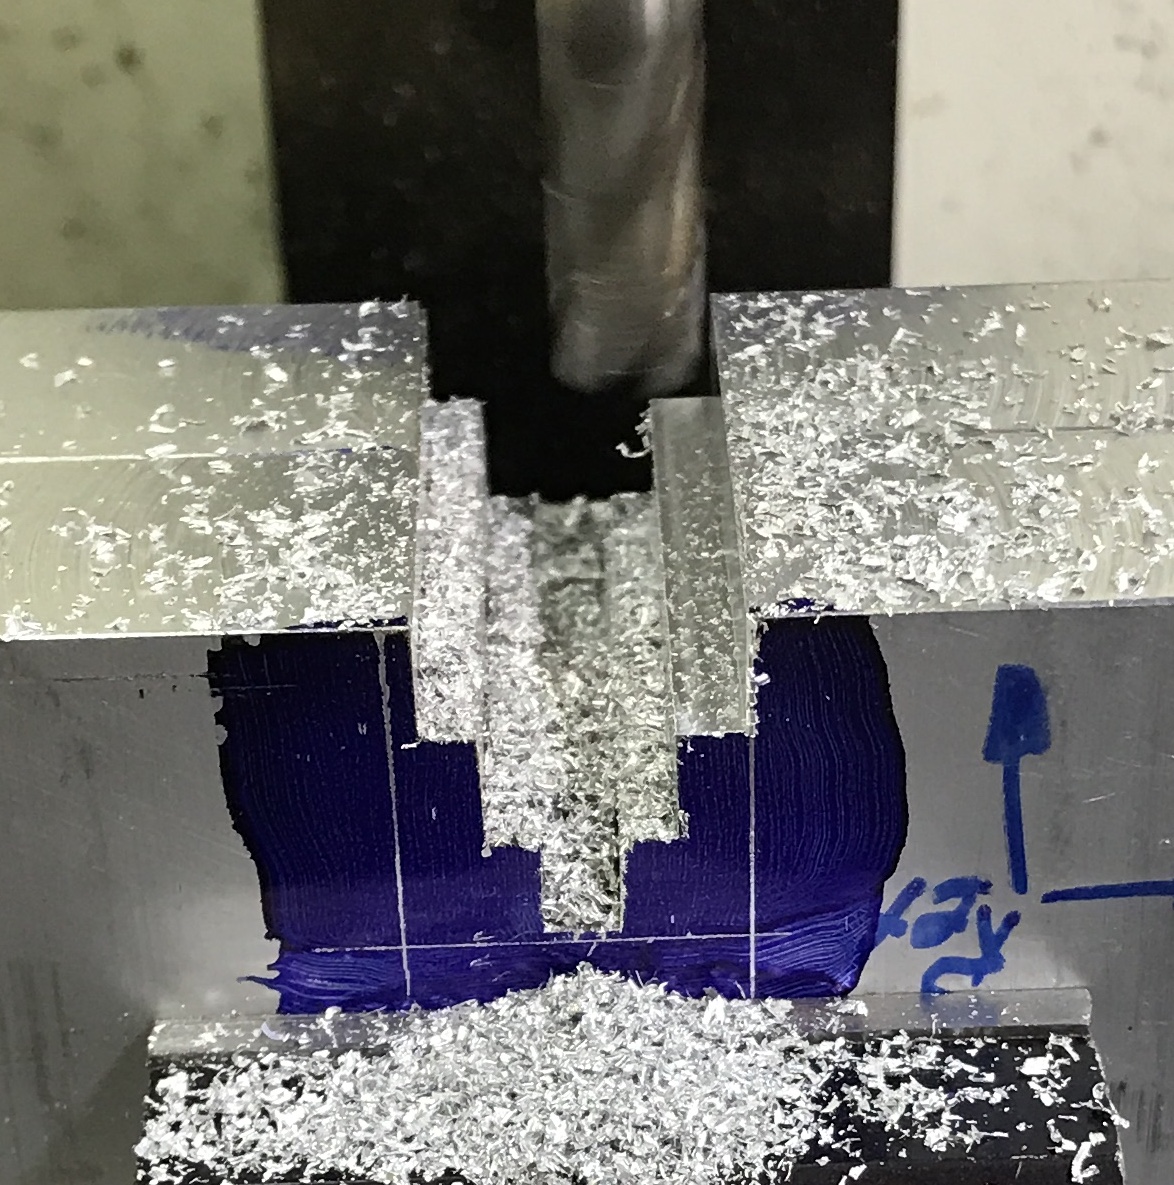
The rods were held in a collet and the nipples were faced off. The blocks were then marked out for the slot and holes. The slot was cut first. The two blocks were held in the vise. A 5/32" end mill was used to cut the slot. The end mill could only cut 1/4" deep before the slot had to be widened. The first photo below shows the cut in progress. The stepped vee was opened with a four flute 3/8" end mill. The end mill was worked over to the side and then lowered in 0.025" increments. As the amount of material increased in width the increments were lowered to 0.015". The second photo shows this in progress.
This was completed on both sides. The depth was carefully increased to half of the total height of the parts. The width was opened so a test block was a tight fit. The parts were sanded on the large sides with the belt sander. It was too tight a fit, so another 0.005" was removed from one side of the slot. This gave a nice sliding fit. The two photos below show the groove and the fit.
There is definitely something wrong with the mill table. As this end mill enters the work it will shift the work to the side by as much as 0.05". Entering the work from the opposite direction produces an equal but opposite shift.
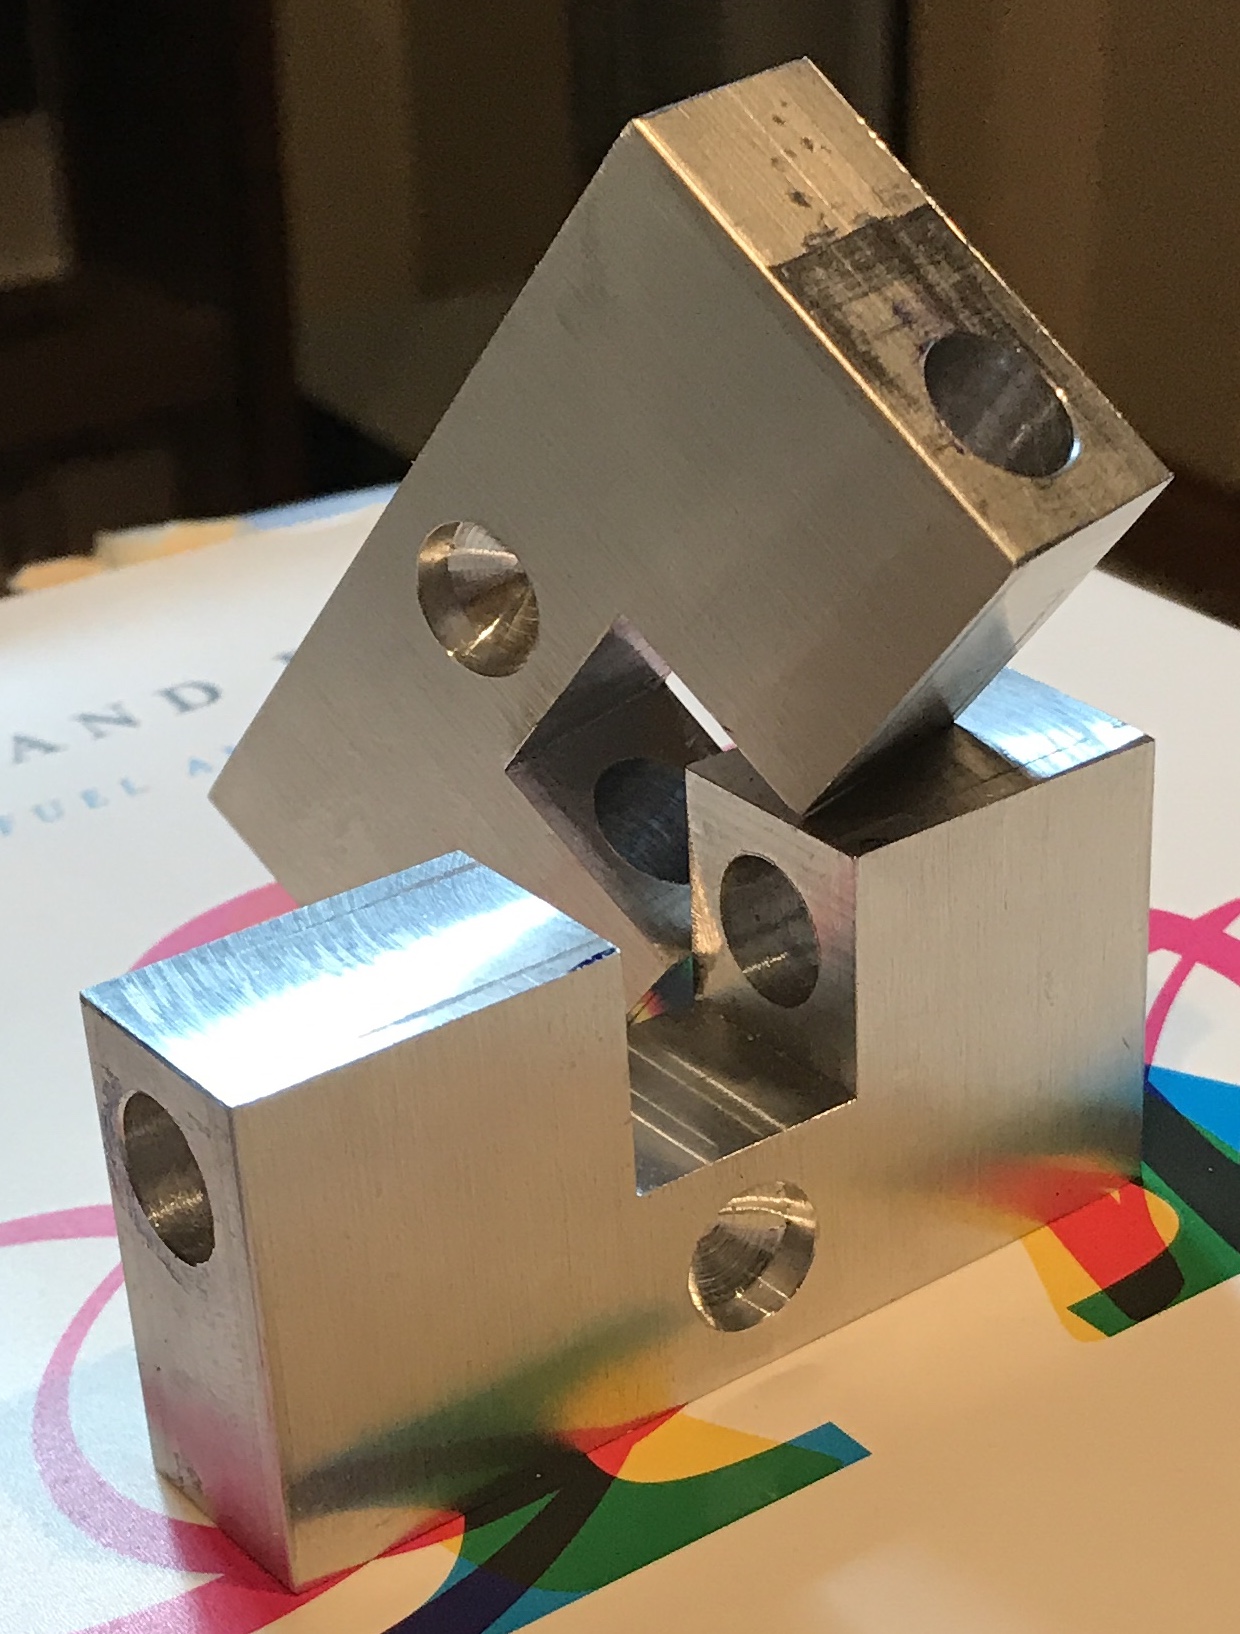
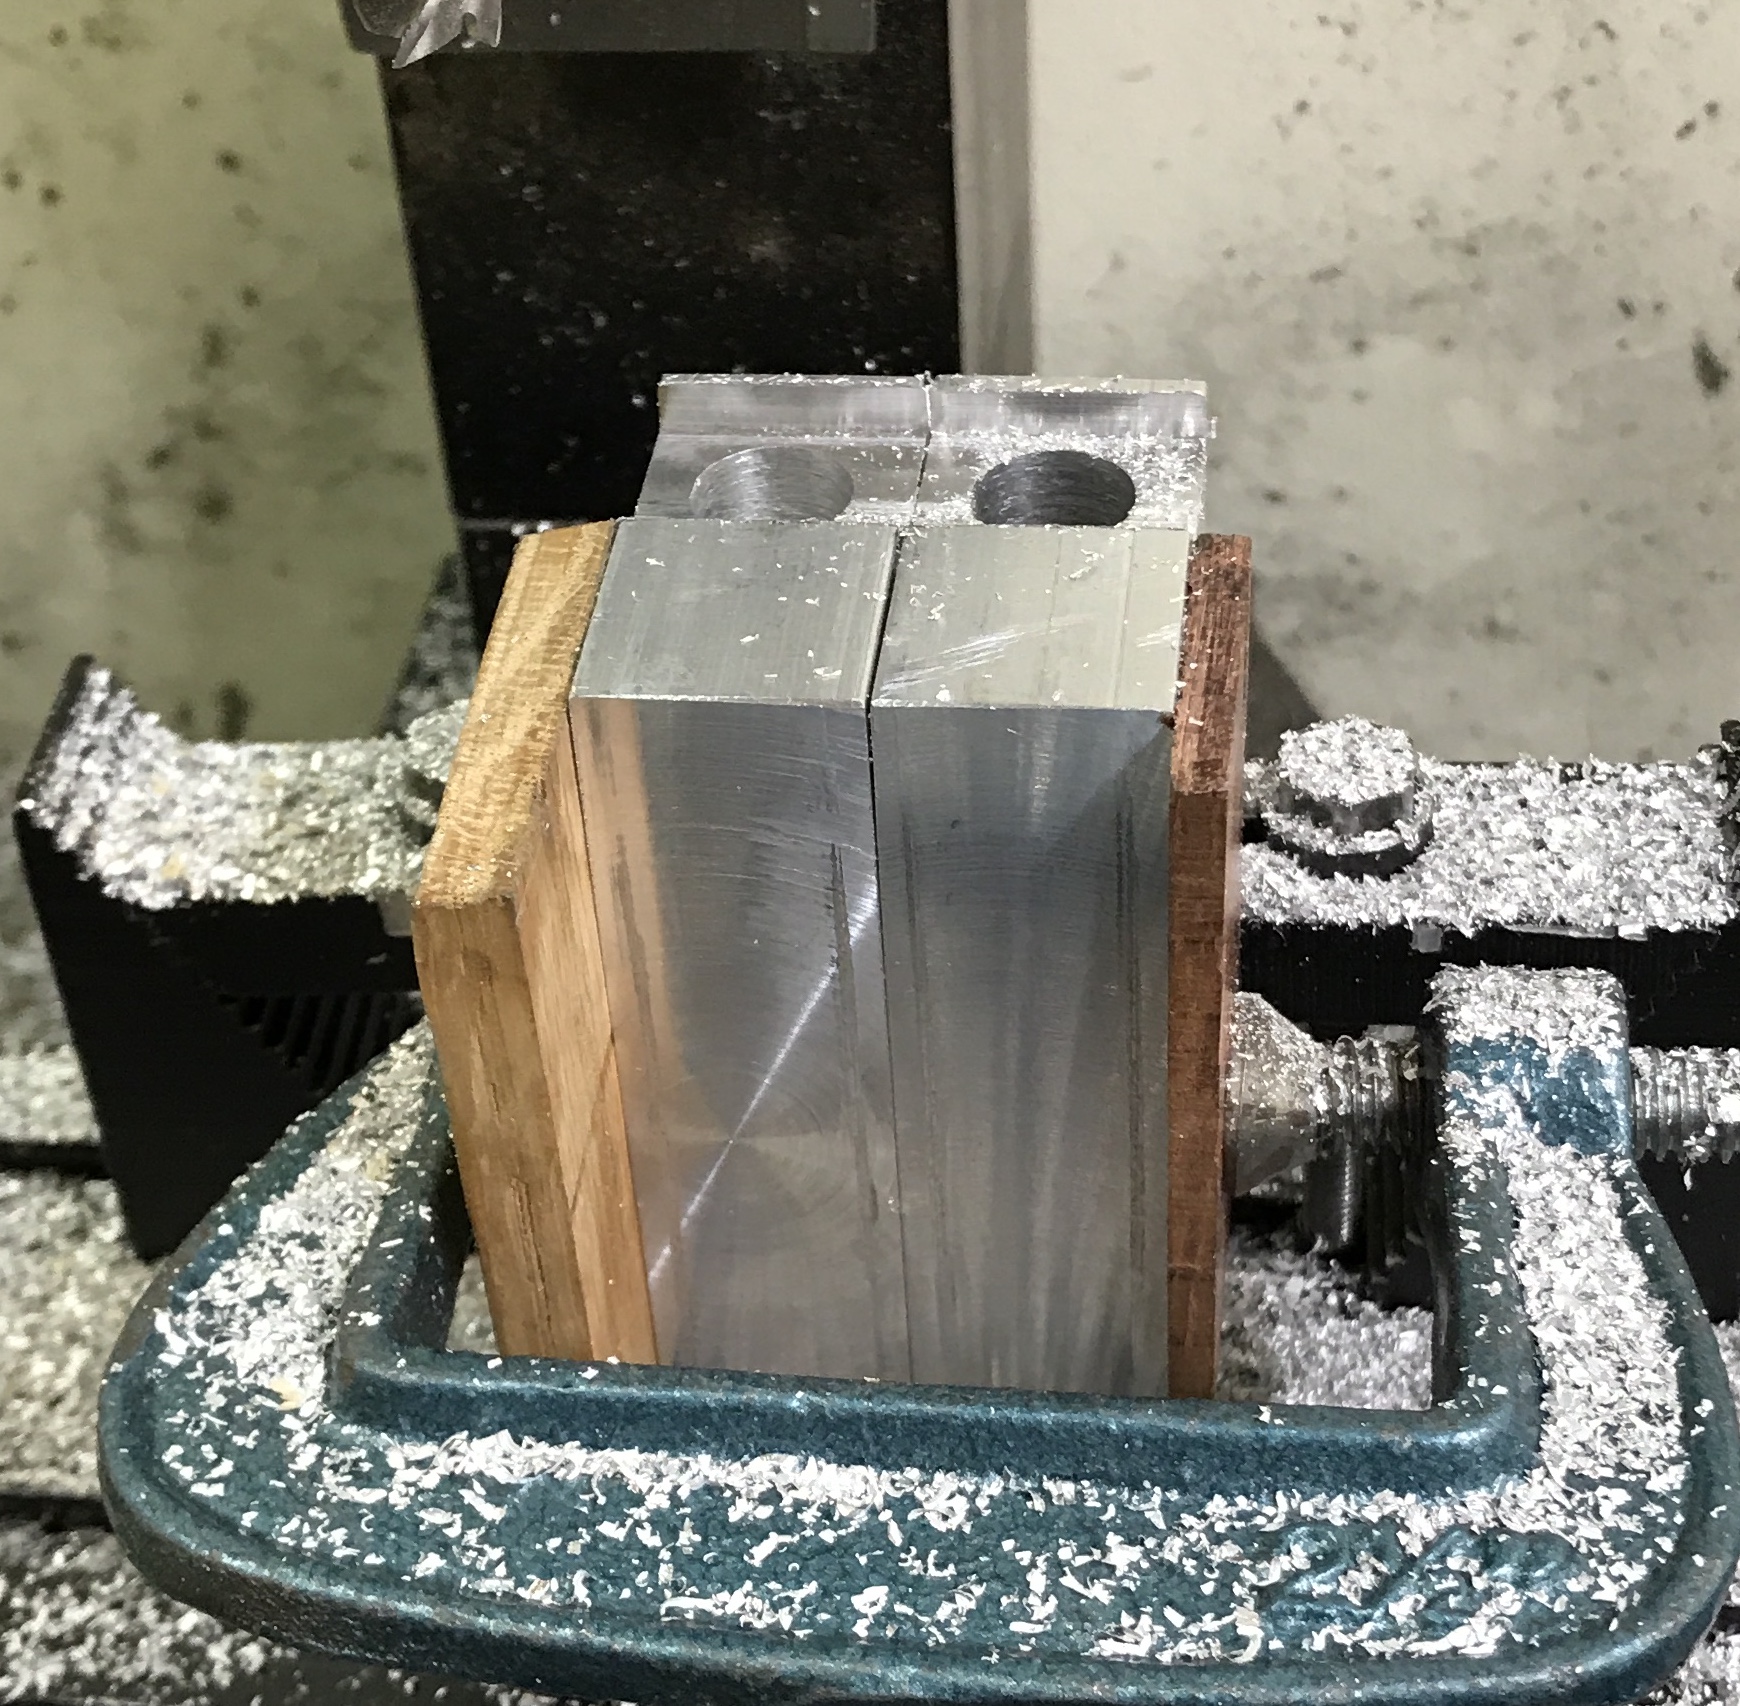
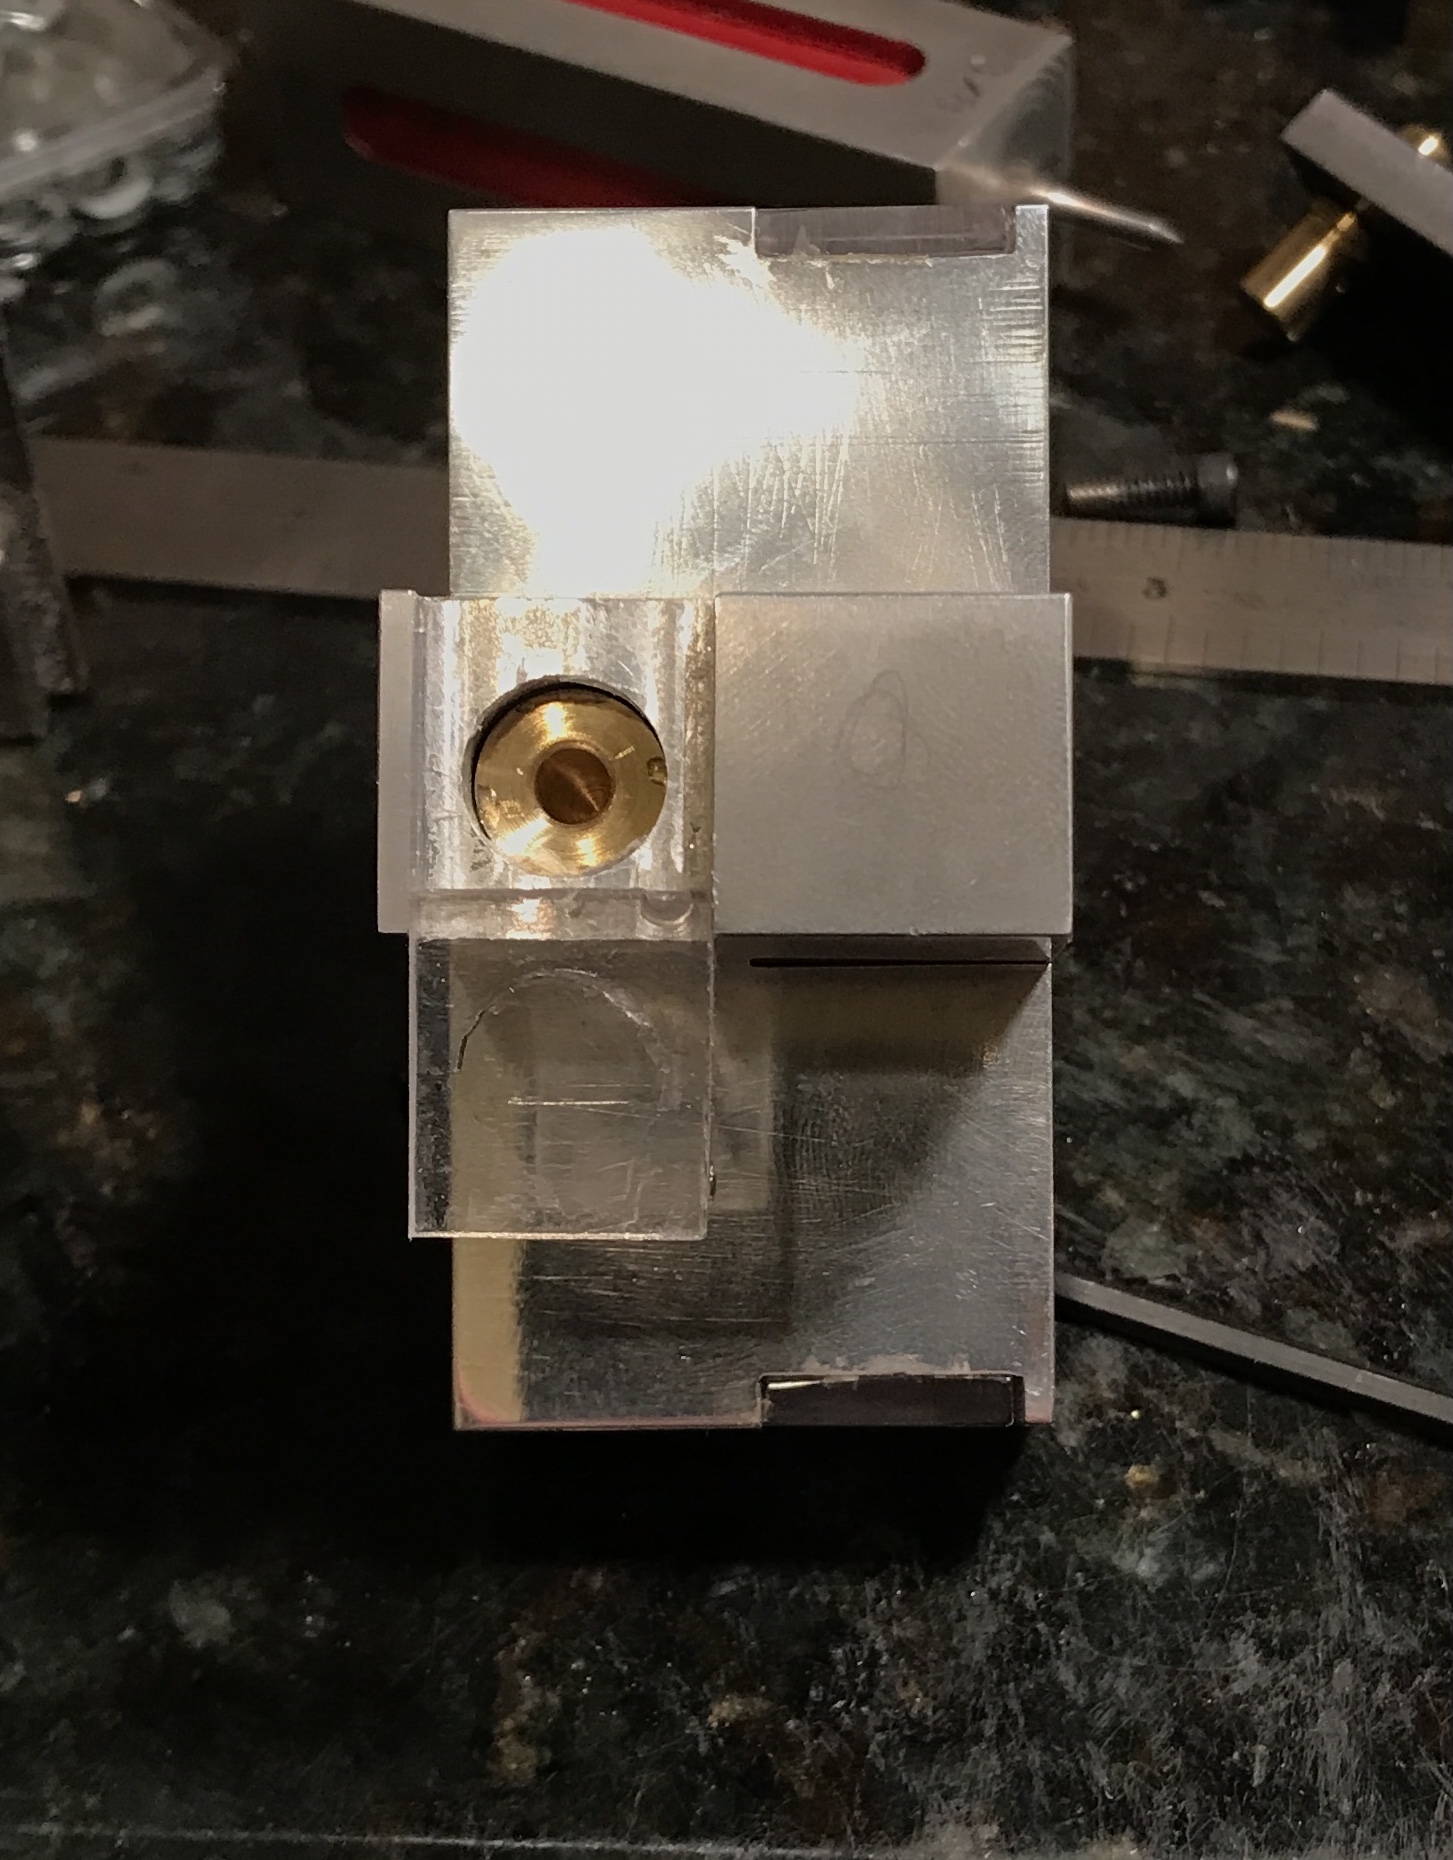
The holes marked out previously were prick punched and then punched with the auto punch. They were started in the mill after clamping the two parts together with a C-clamp. They were drilled with a center, 3/16", 1/4", and 5/16" drills. They were transferred to a drill press vise and drilled with 3/8" and 7/16" drills. The 7/16" drill was drilled 1 1/4" deep into the adjoining block. After deburring the parts were almost complete.
The windows were made next. A leftover 1/8" thick acrylic sheet from the dodecahedron library was utilized. A 3/4" strip was cut from this sheet with a saber saw, while it was backed with a piece of plywood. The plastic cut well and left pretty smooth edges. The strip was cut into six 5/8" rectangles with a handsaw and a bench block. The edges were filed smooth. An attempt was made to sand one piece. It was sanded to 2000 grit. Even this fine sand paper left a slightly cloudy finish. The other five pieces were just polished on a cloth wheel with the blue rouge. The picture below shows the result. The cloudy window is the middle one on the left side. The edges of the plastic pieces were sanded with the disk sander to give approximately 5/8" X 3/4" pieces.

The blocks were clamped together and clamped to the milling table with step clamps. The edge of the block was located with the 3/8" end mill. The table was advanced 0.563". A 1/8" deep groove was cut in five passes across both blocks. The groove was widened in 0.020" increments in one direction and then in the other. The grooves were widened to fit the plastic pieces that were 0.617", 0.624", 0.625", and 0.631" wide. The blocks were flipped and the same operation was performed on the opposite end. The first photo shows the milling setup and the second the plastic windows in place.
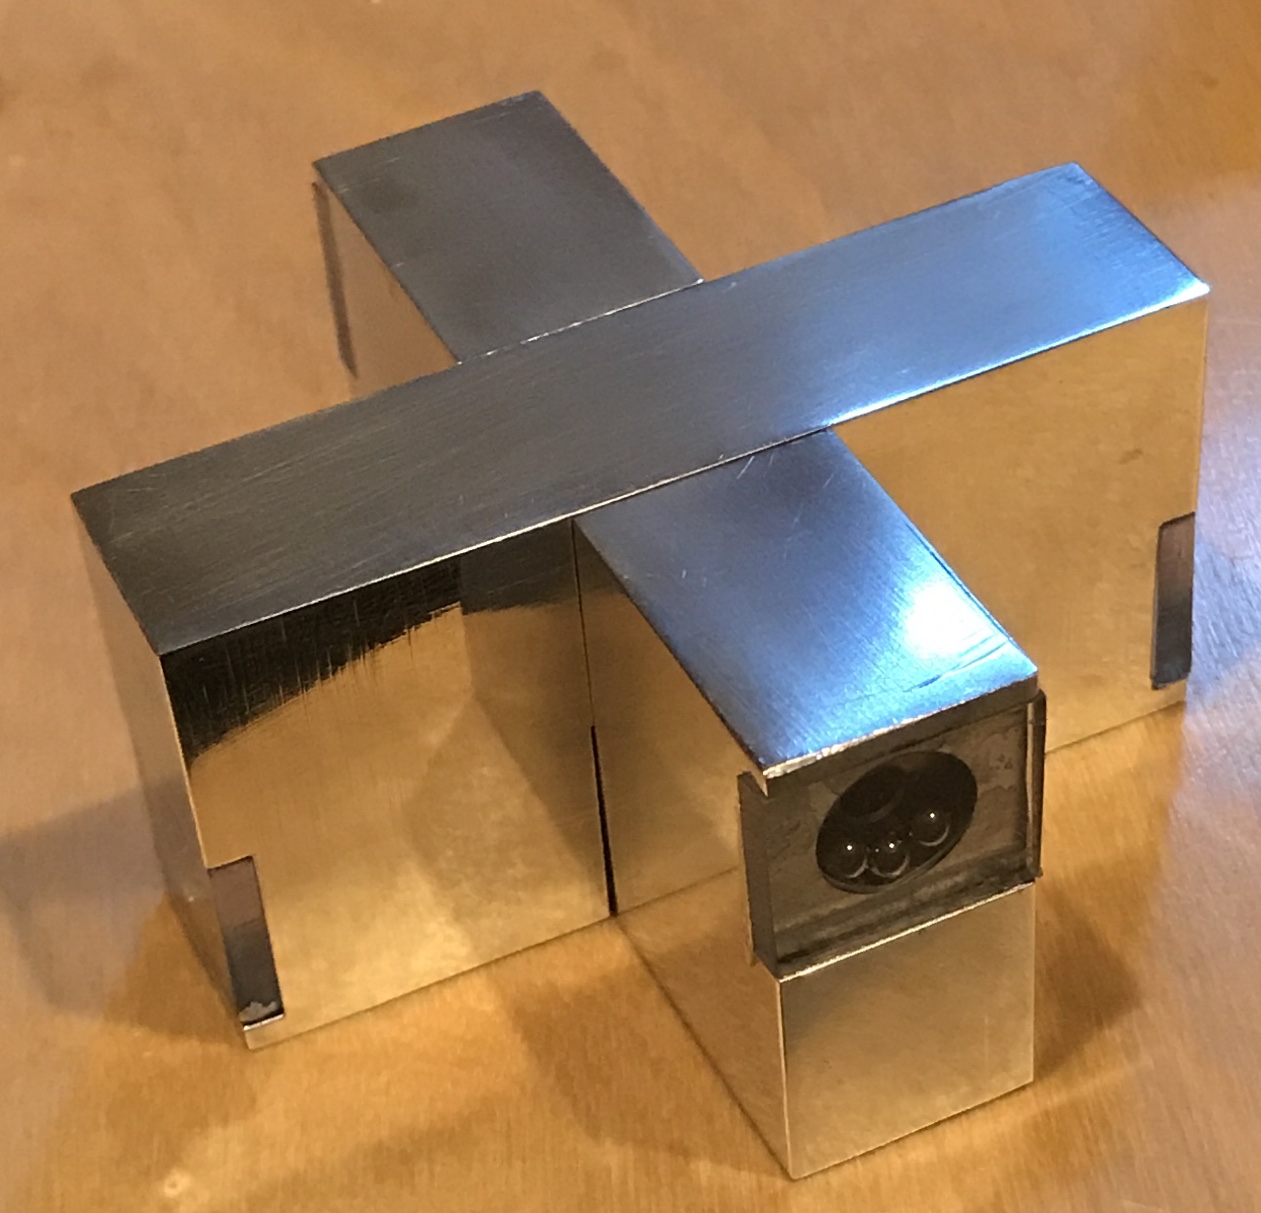
The blocks were sanded. Some faces needed 400 grit while others were sanded at 1000 grit. After all faces were sanded up to 1000 grit, the blocks were polished with white rouge on the aluminum wheel. The blocks were washed with soap and warm water. The resulting blocks can be seen below. All that remains is assembly and gluing the windows in place. The ball bearings have been ordered.
The rods and ball bearings need to be put in before gluing the windows!!!

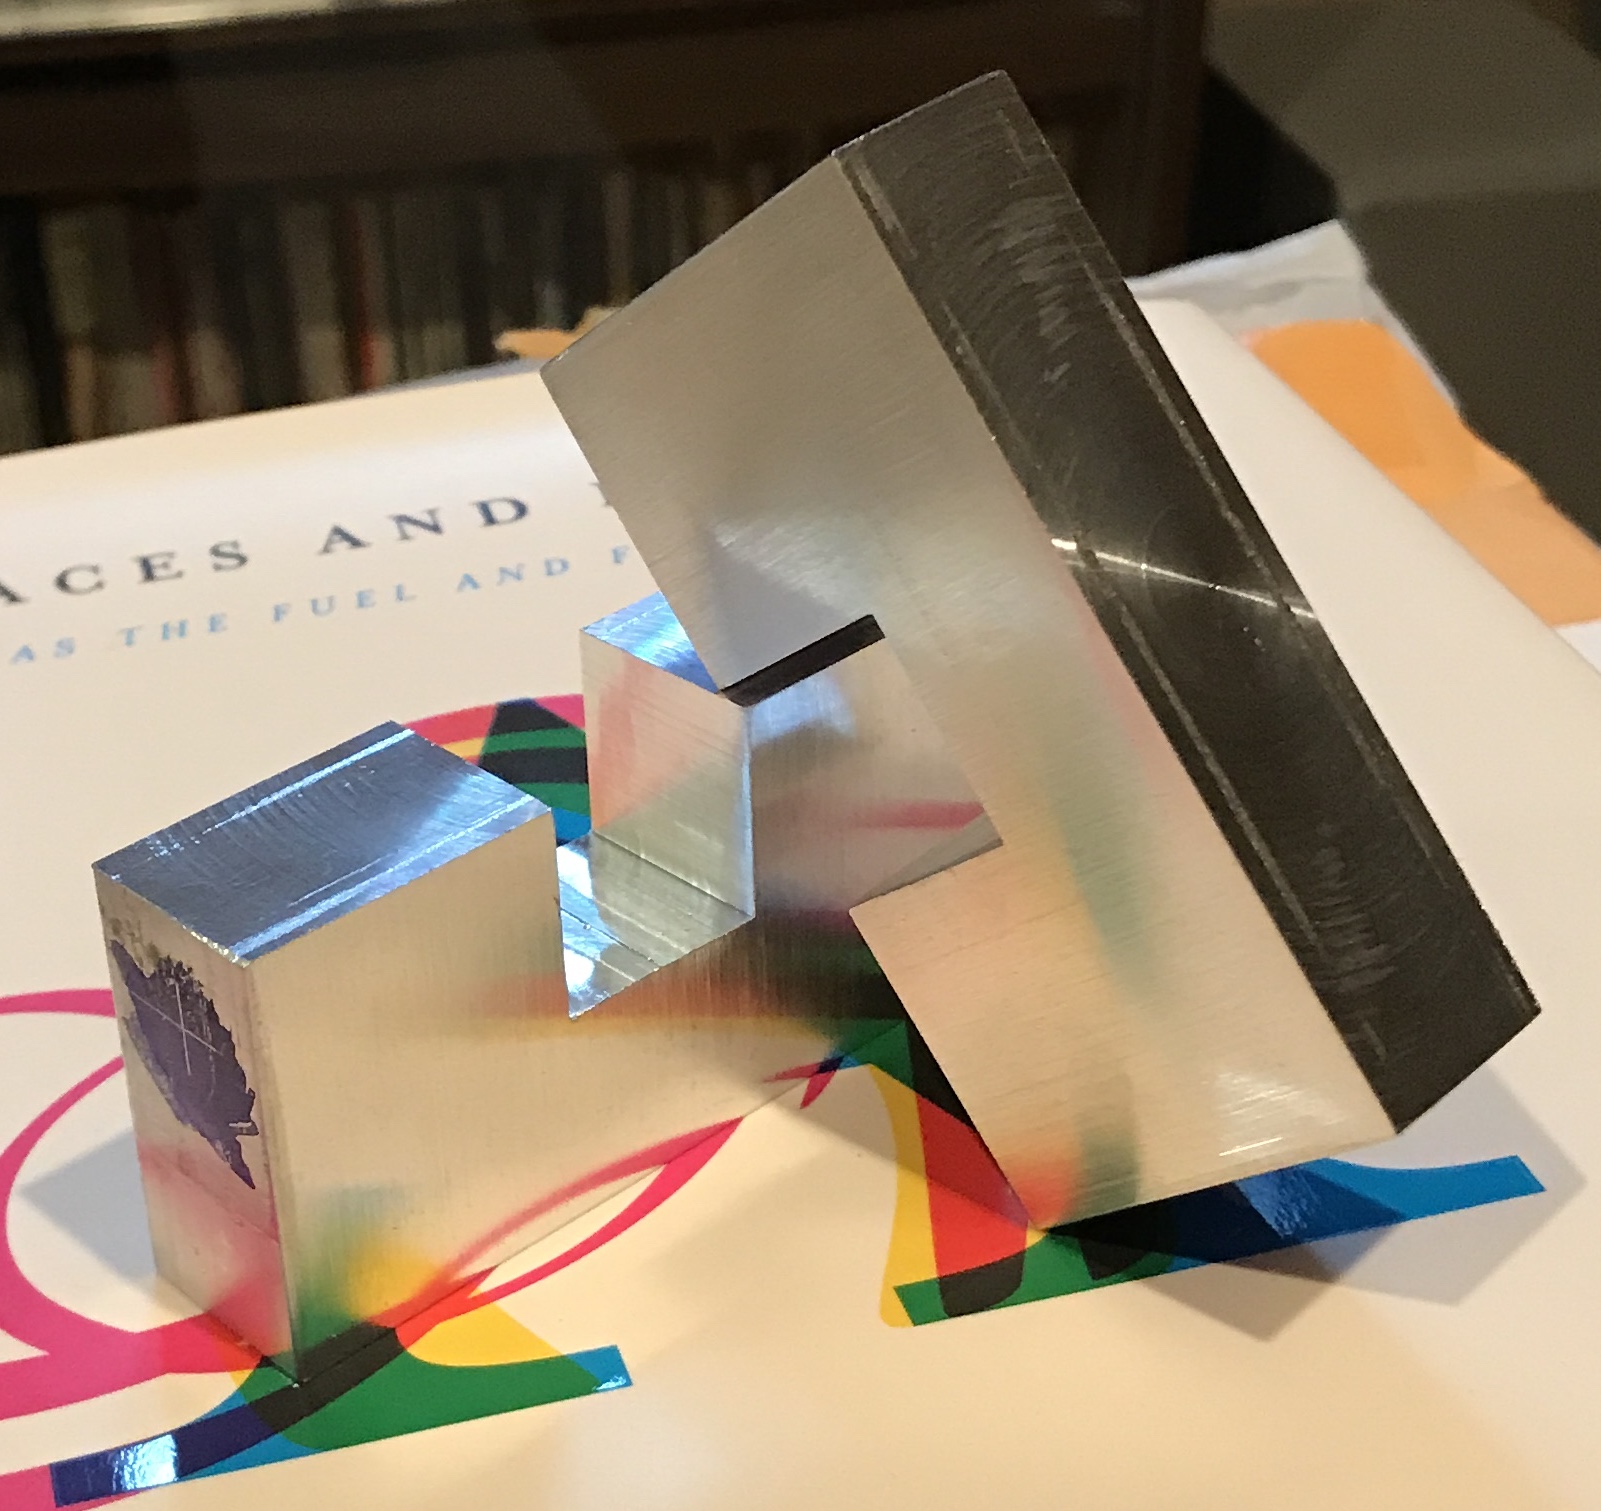
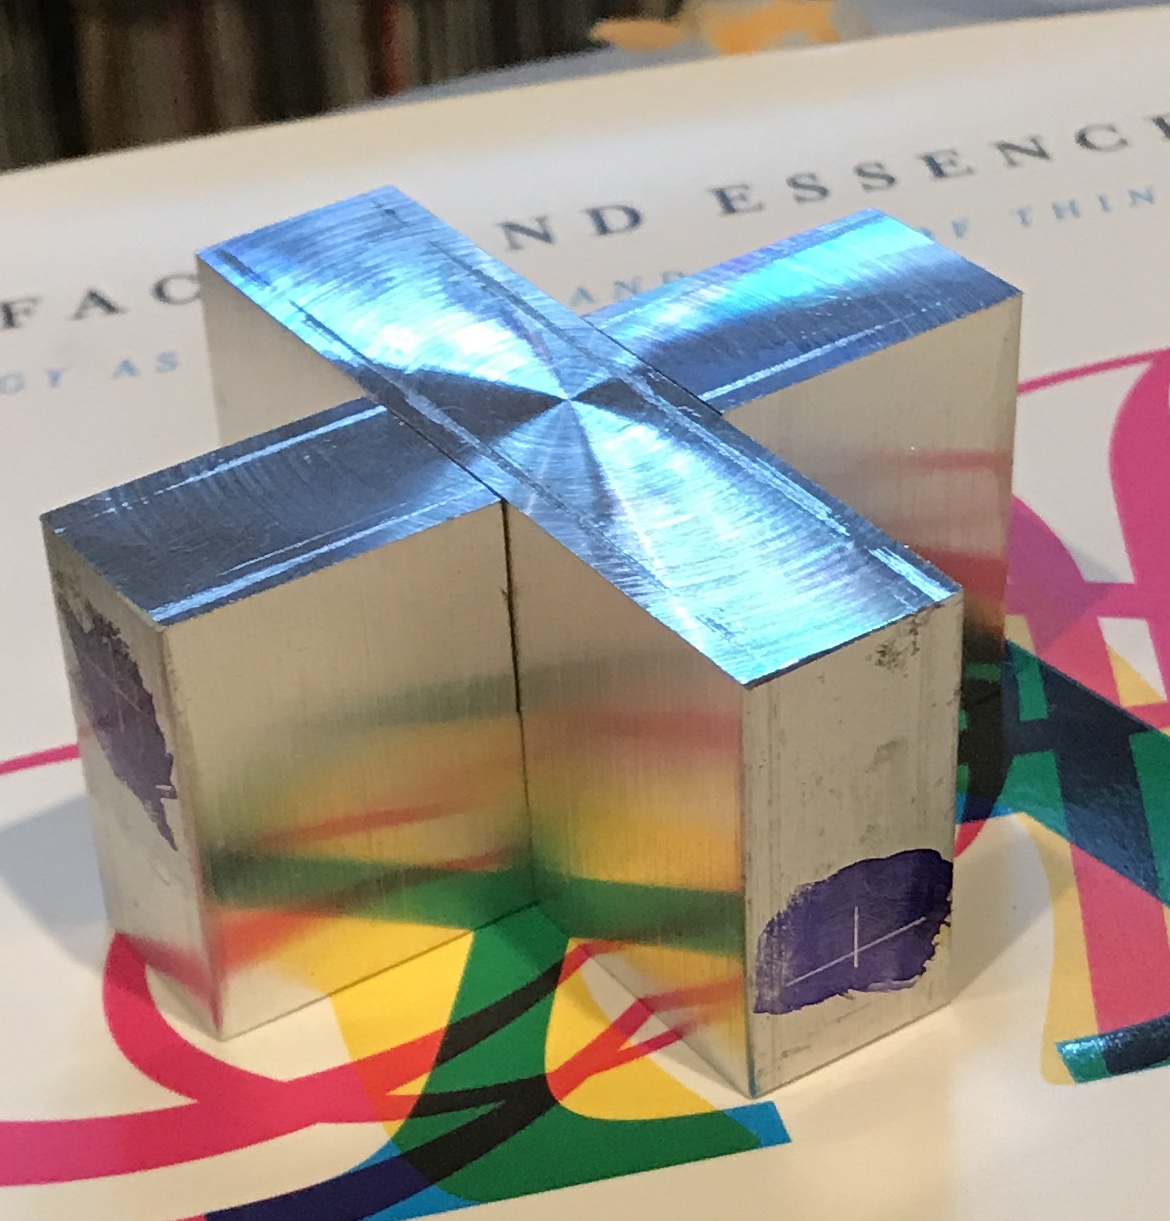
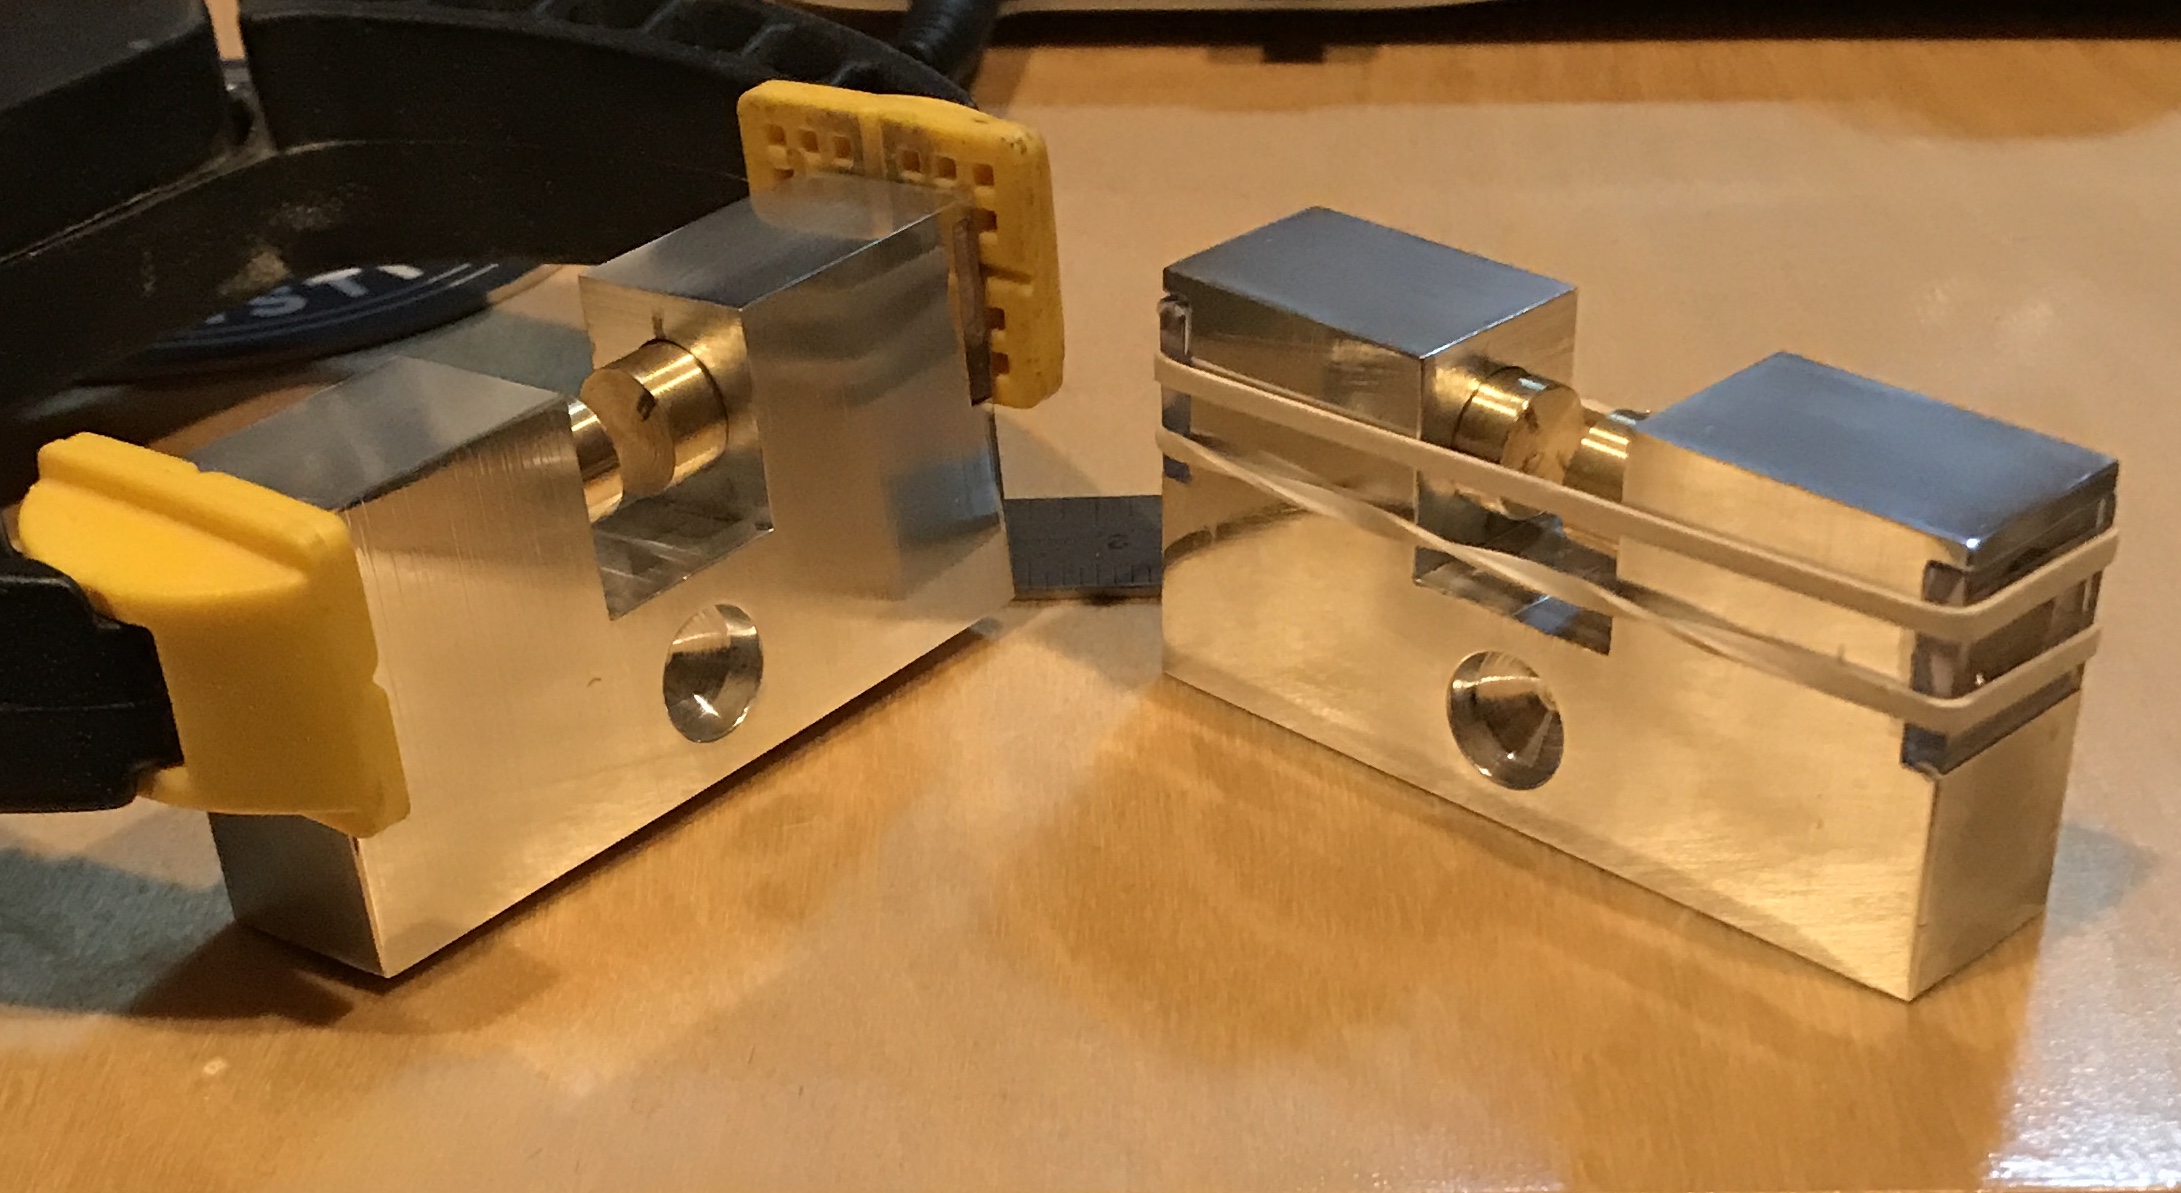
The puzzle was completed this morning. The bearings arrived yesterday. The shafts and the plastic covers all had to be matched with their specific hole. Three bearings were put into a shaft and the shaft loaded into its hole. Two component epoxy was smeared onto the aluminum with a toothpick. The plastic cover was put in place. The first cover was difficult to keep in place. When its opposite partner was glued in place both were held with a clamp. The same process was repeated on the second part. Its covers were held in place with a rubber band. The final glue up is seen below along with the completed Swiss Cross.
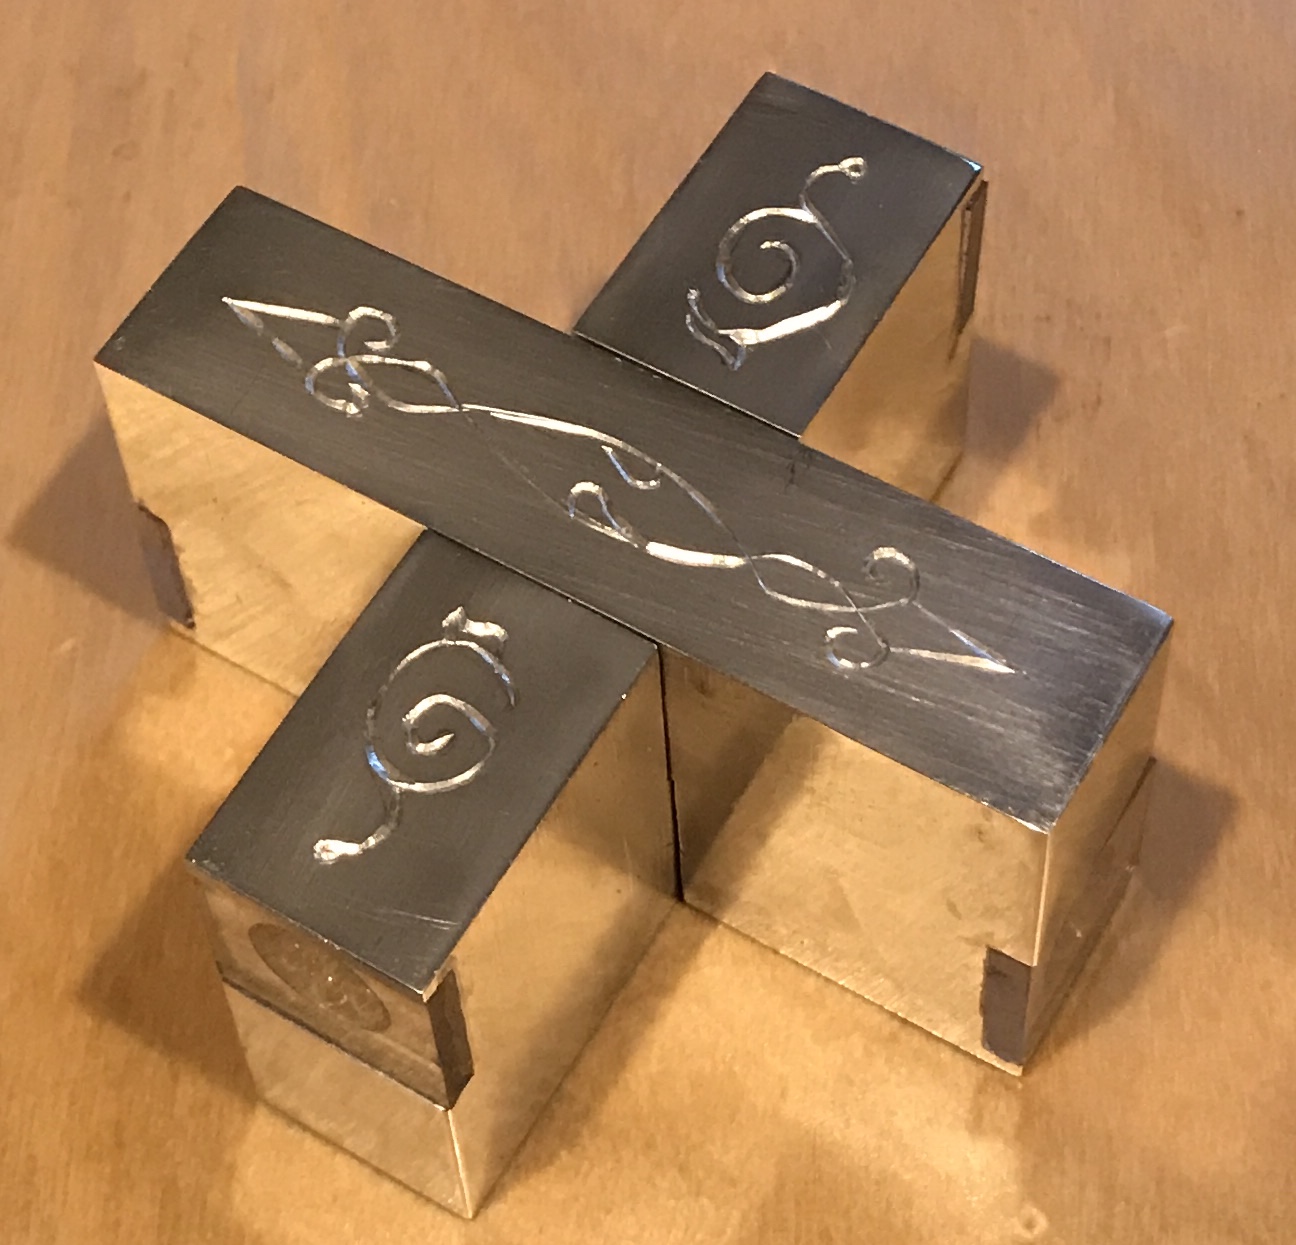
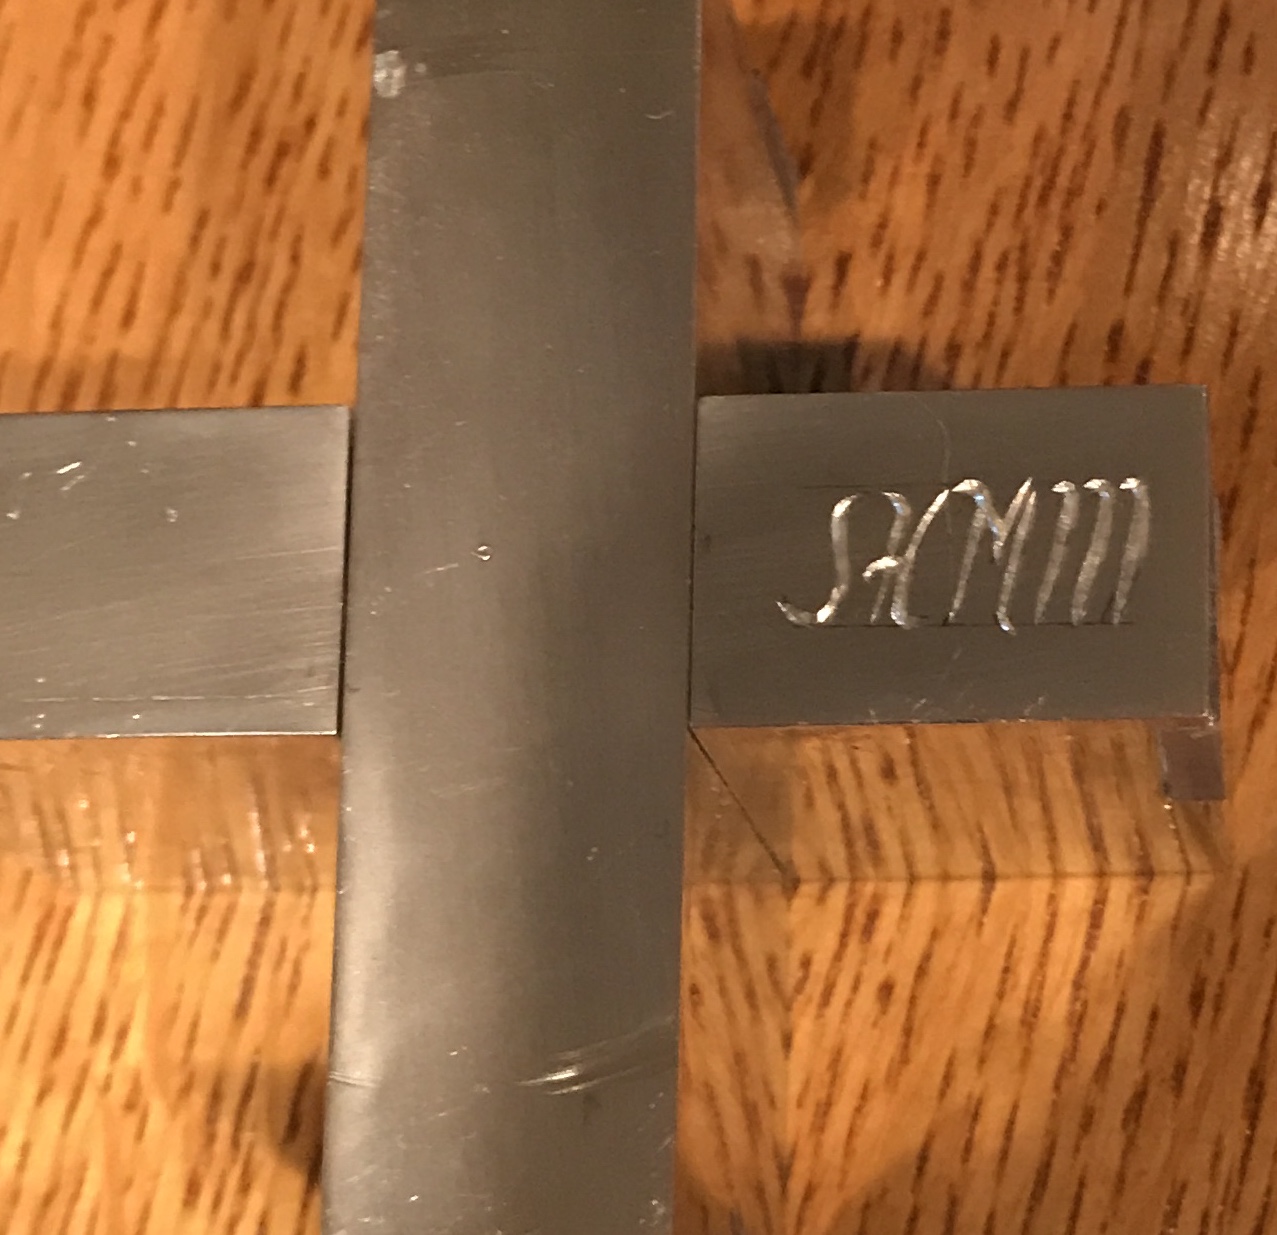
Spent a little time online seeking some decoration to engrave on the puzzle. I finally settled on a few simple scrolls. I also put my initials on the back.
I attempted to open the puzzle and was unable to get it to work. All of the pins are out to the plastic, but the two pieces don't come apart. Time to investigate and may need to remove plastic to shorten one or more of the pins.
Not the right place to put this note, but it is too short for a full page. Cutting some steel of unknown origin completely dulled the blade on the bandsaw. A new bandsaw blade was purchased. The manual was somewhat helpful as the blade was changed. It was quite difficult removing the old blade. The new blade (5' X 1/2" X 0.025" 10/14V Irwin Bimetal Bandsaw Blade from MSC Direct) was installed. Some time was spent aligning the bearings to ensure the blade was vertical. All eight of the oil fixtures was topped off with oil. The bandsaw blade tension was set per the manual. A test cut was made on a piece of 1" steel round bar. The picture below doesn't do justice to the perfect cut! The finish was smooth and the disc thickness varied by ±0.010"!!
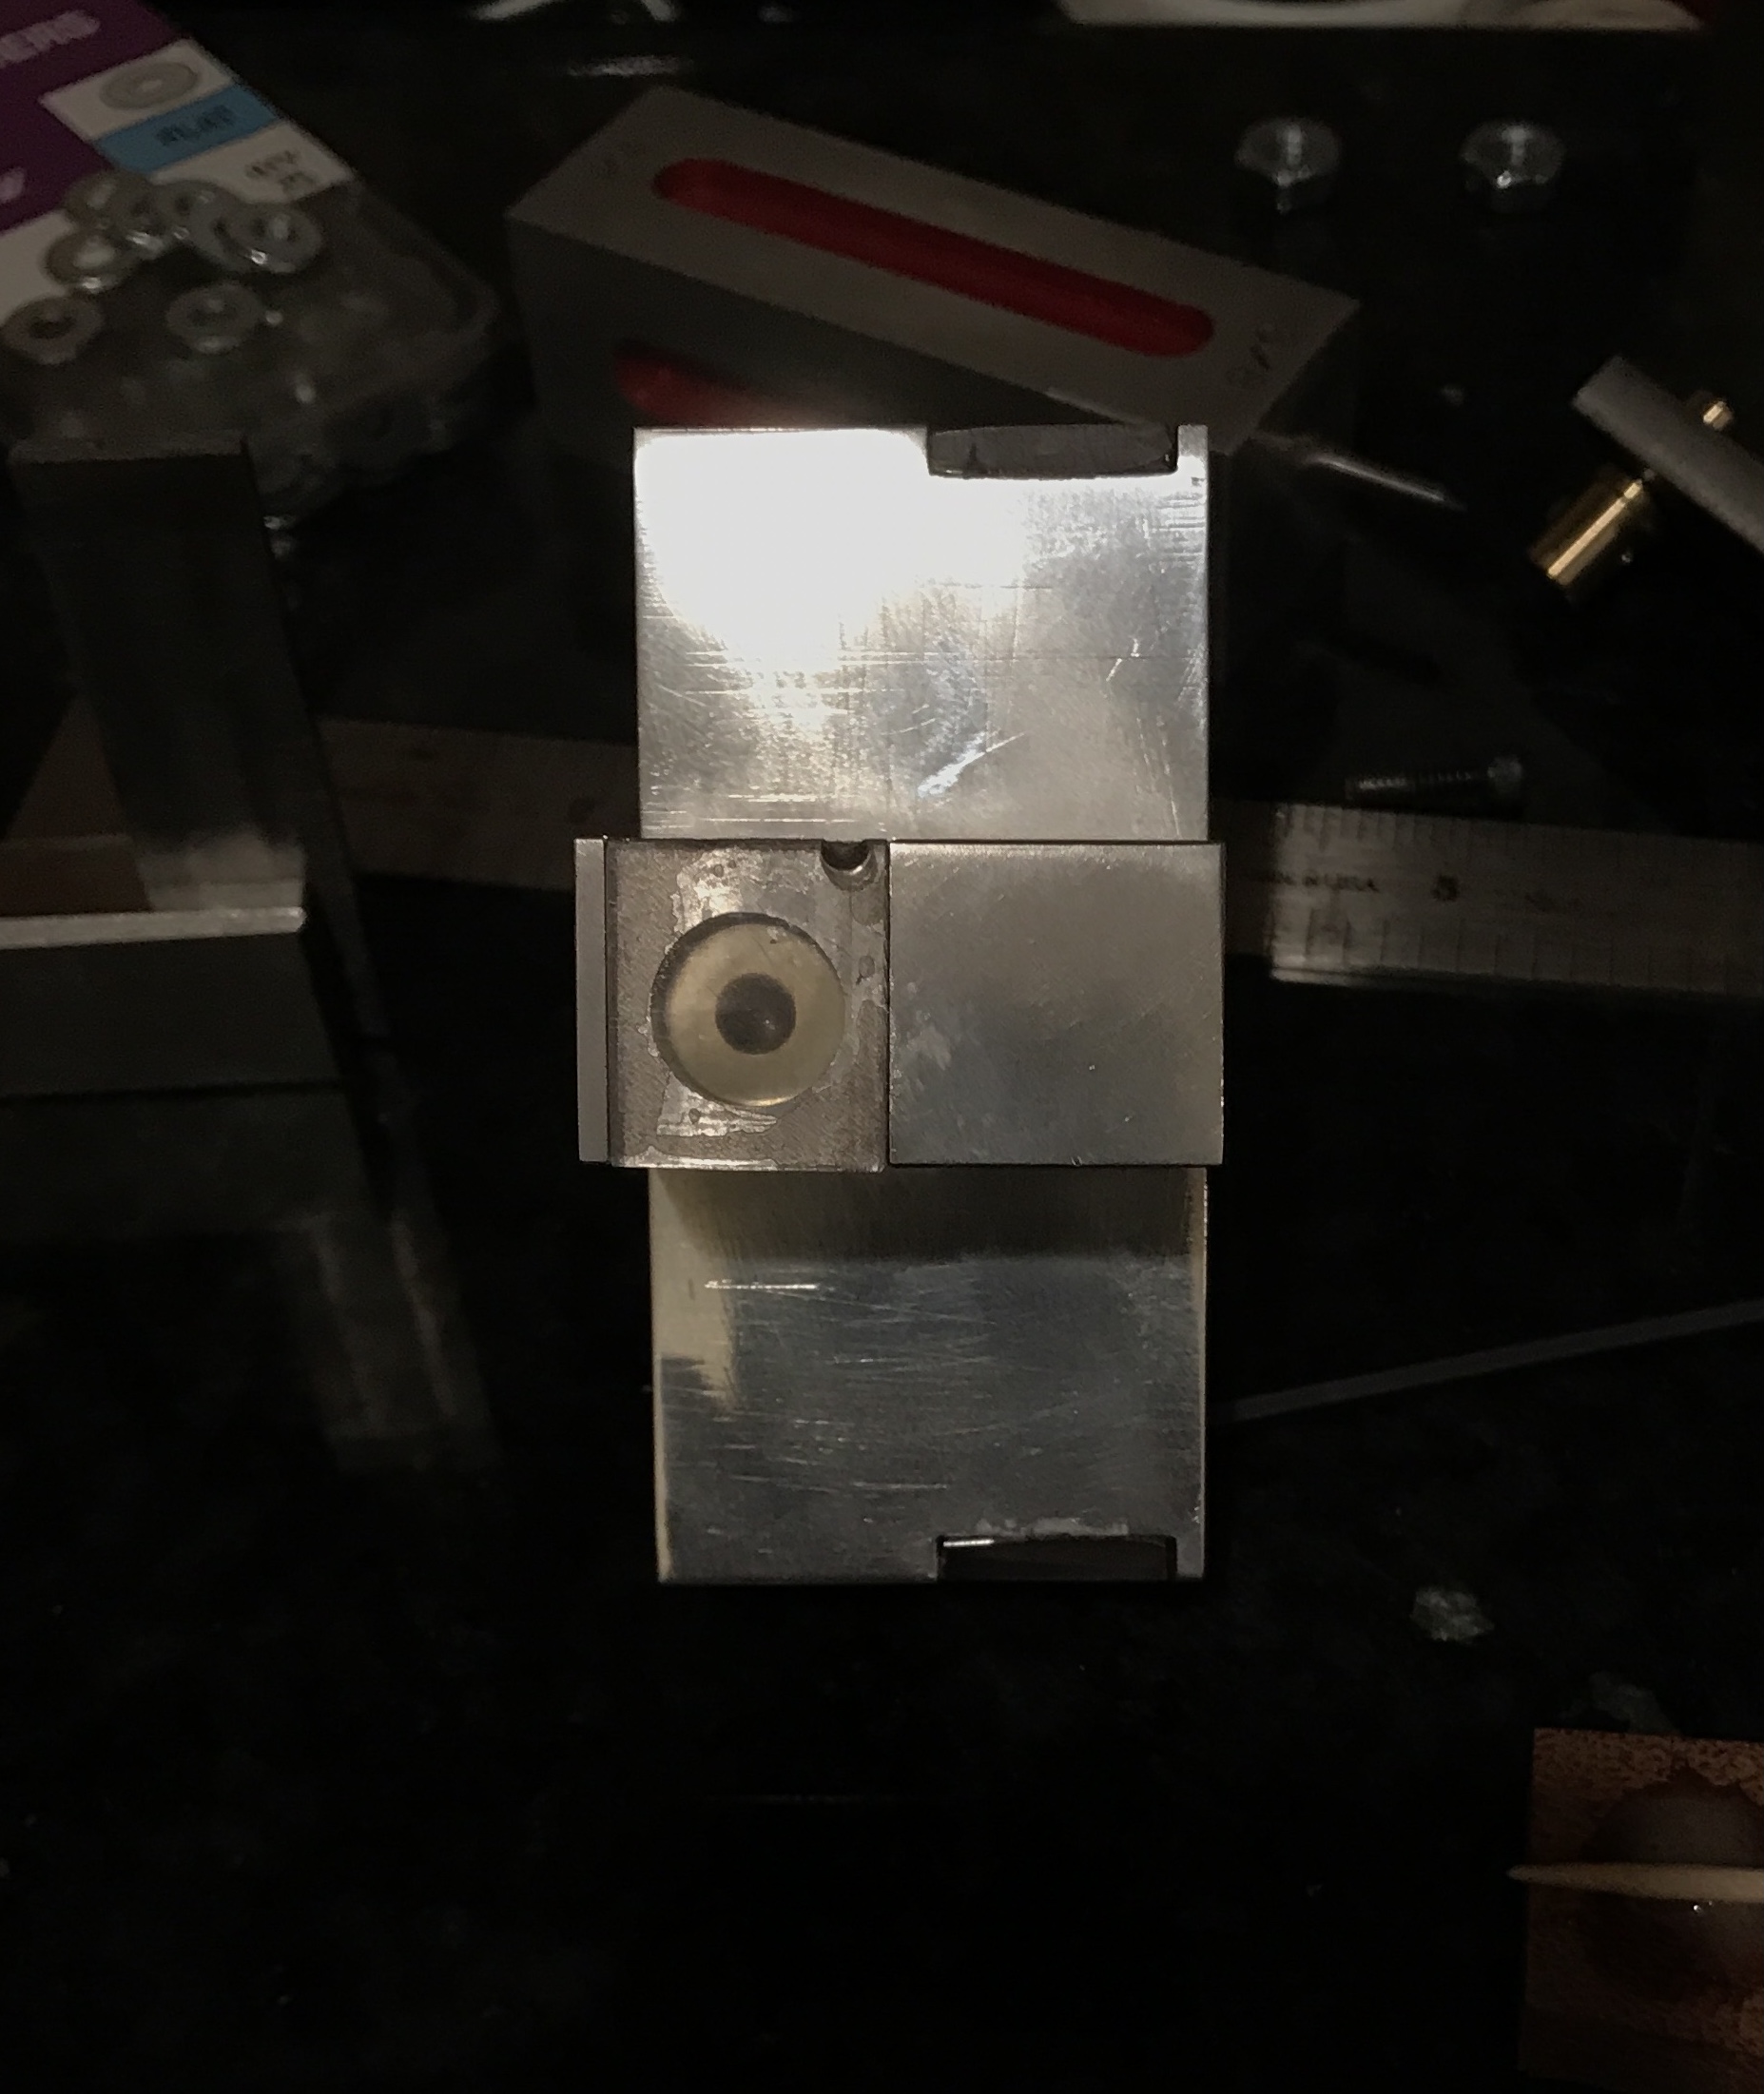
I was able to determine which of the four pins was the culprit by shining a light behind each of the four gaps between the two parts. The pin highlighted does seem to have more cruft between it and the plastic plate. On closer inspection it can be seen that this cruft prevents the pin from touching the plastic plate. I am not sure of the best way to remove the plate from the aluminum. It is a good fit on the sides and the top and bottom of the plate are covered by the aluminum. I will attempt to break it loose by tapping on the side of the plate.
The puzzle was held in the vise with aluminum soft jaws. The plate was easily removed by tapping with a center punch. See the picture below. There was glue practically everywhere. Glue was on the inside rim of the hole, on the face of the pin, and on the face of the plastic. The glue on the metal was carefully scraped away. The face of the pin was sanded to 2000 grit and then polished. The face of the plastic was also sanded to 2000 grit and polished with blue rouge. Epoxy was made up and applied very sparingly to the face of the aluminum with most concentrated on the sides of the slot. The plastic plate was inserted into the slot after inserting the pin and the three ball bearings. It was allowed to dry for 24 hours.
The 2-part epoxy may be going bad. The clear material was very thick. It looked like it had started to crystalize on the sides of the bottle. It came out more like jelly than a thick liquid. It loosened up when the hardener was mixed in. Time to purchase more T-88 epoxy from Rockler or Woodcraft.
It is the first day of fall. The harvest moon was shining through the skylight last night at 1:00 am when I awoke with a migraine. But more importantly the puzzle works like a champ!